Ordering Guide
Guide to Ordering
Custom Apparel
There are many different ways that you can customize your apparel. Begin by shopping the categories and choosing the desired item. Find and choose the color you would like. Then choosing your customizations are as easy as 1, 2, 3!
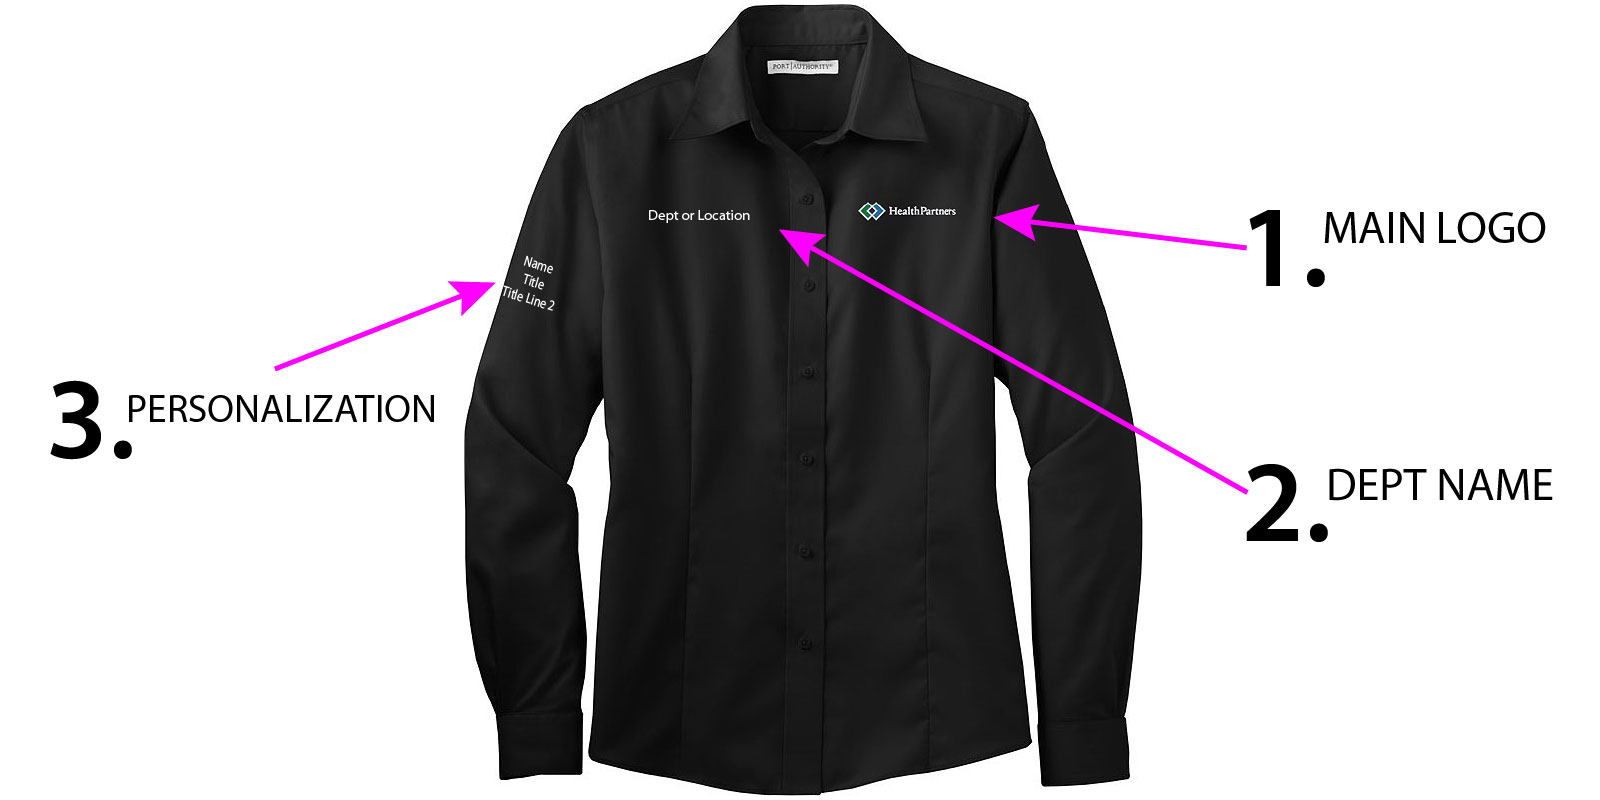
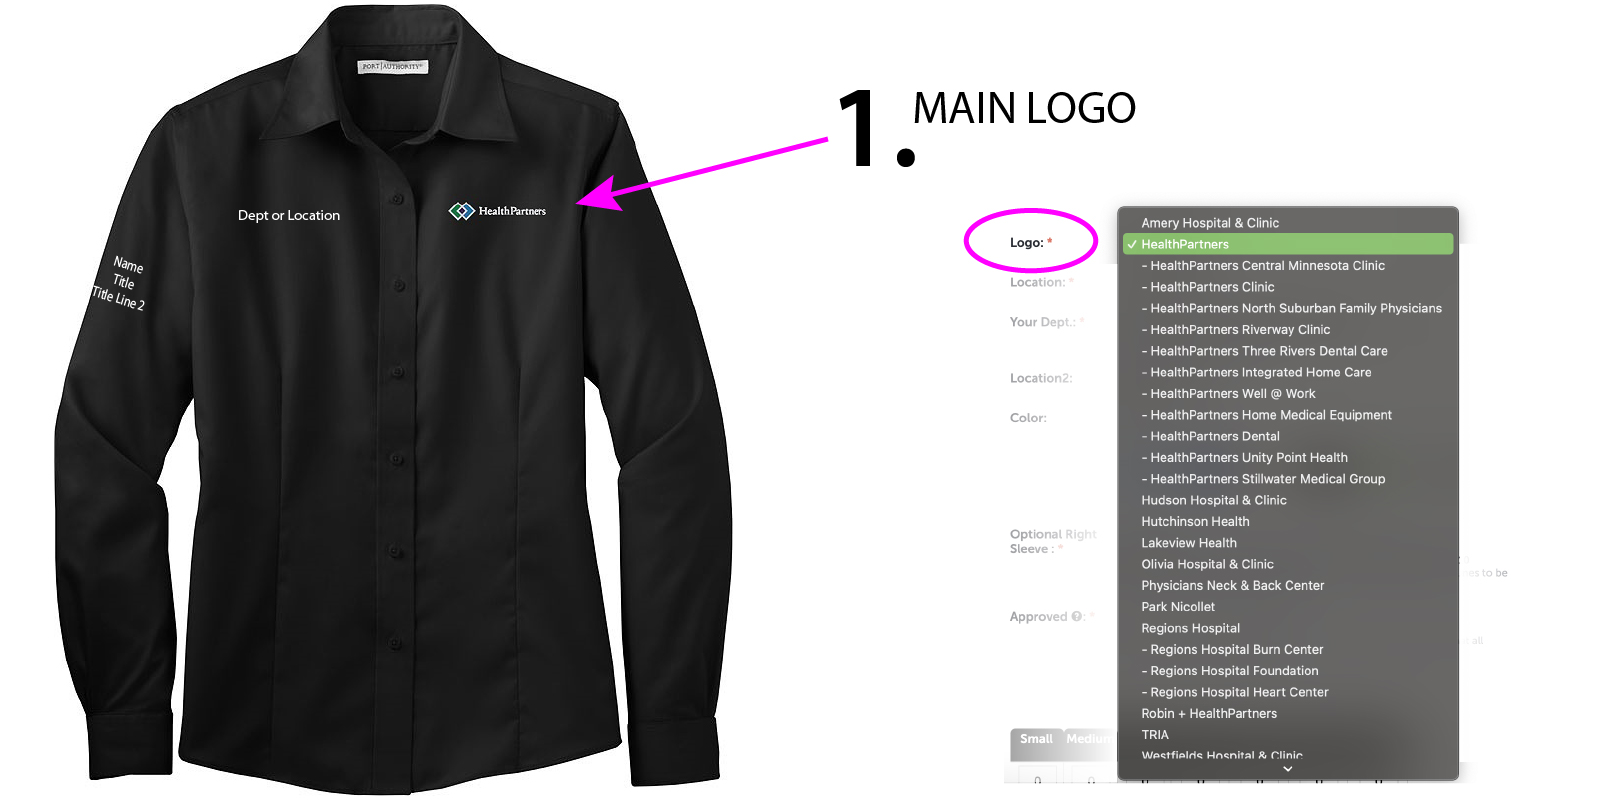
Step 1
Choose the desired main logo that will be decorated on the LEFT CHEST of the item you have chosen. The dropdown menu to choose from is labeed "Logo" and has approximately 27 logos to choose from. As you choose a logo here, the logo on the image will change to show you your choice. All logos are pre-set with correct brand colors for each item color selected.
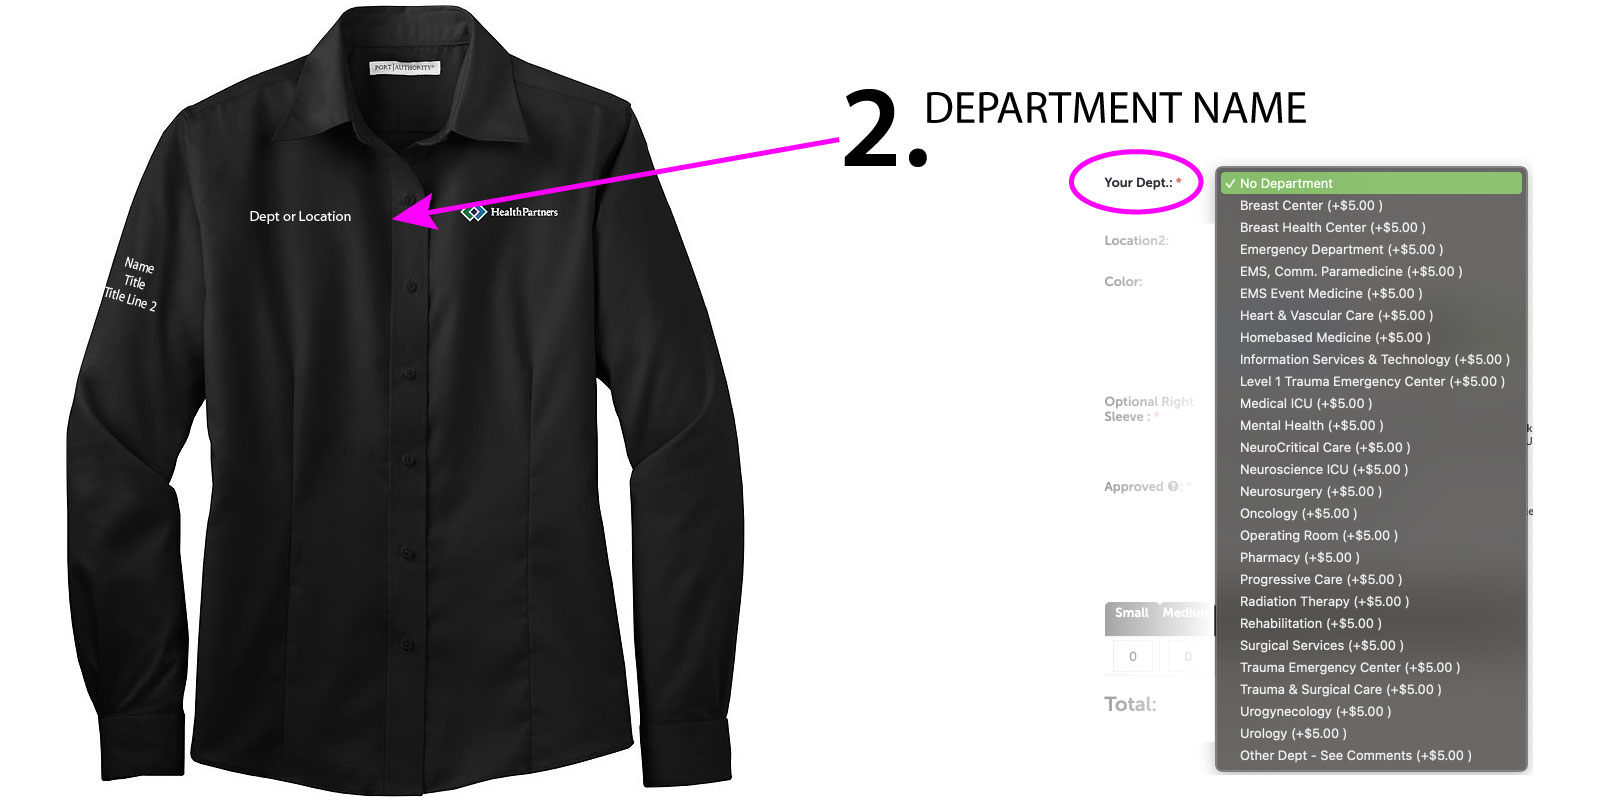
Step 2
Choose the desired department name from the list that will be decorated on the RIGHT CHEST of the item you have chosen. The dropdown menu to choose from is labeled "Your Dept." and has approximately 24 logos to choose from. The logo will be stitched on the garment exactly as it appears in the dropdown. There is also an option to chose "Other - See Comments" where you can type in the department name if it is not on the list. However, if you type the department name in the comments in all caps, we will correct the department name to be correct capitalization (ex. PHARMACY will be stitched on the item like "Pharmacy").
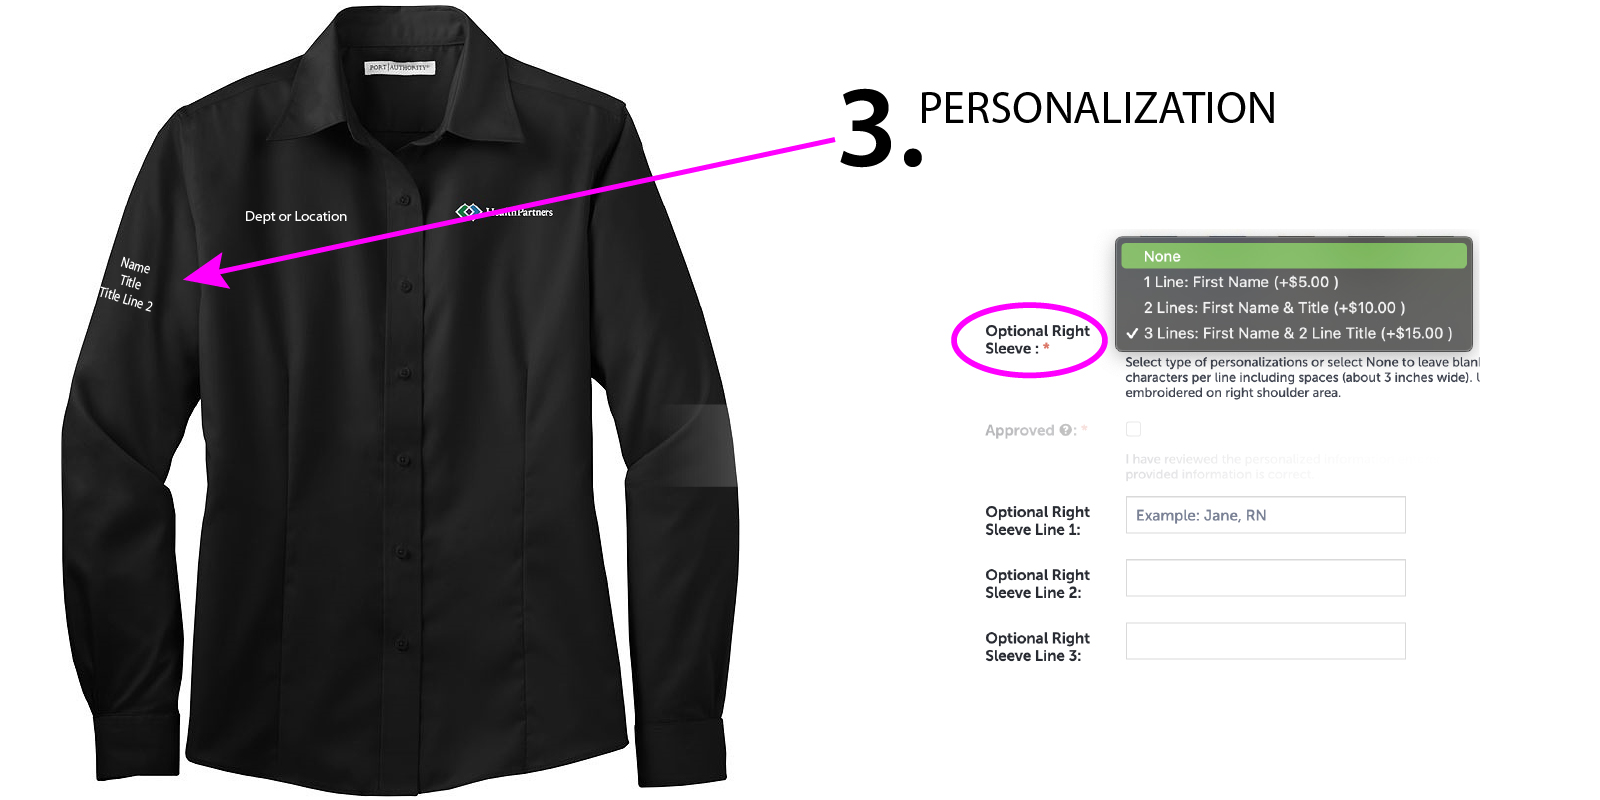
Step 3
Choose the number of lines of text from the list that will be decorated on the RIGHT SLEEVE of the item you have chosen. The dropdown menu to choose from is labeled "Optional Right Sleeve" and has the option of up to 3 lines of personalized text. The personalization text entered into the lines is exactly how it will appear on the item being decorated (ex. If you enter Jane, RN, then the J and RN will be stitched on the item in all caps and rest "ane" will be stitched in all lowercase).